New Video Is Up


new video is up
More Posts from Nastysynth and Others


some puppies studies ( ͡° ͜ʖ ͡°) 🐶 | Instagram
(Edited) + more studies lkdafña

i am SO sorry for the super long response, but i thought this might make a nice little tutorial opportunity, since soft body physics can be… frustrating, to say the least. i’ve noticed that it tends to respond better to spherical meshes than most others, so getting it to work with something with a lot of hard edges and flat planes can be a little tricky (at least in my experience).
so! to get started, here’s my basic setup

the only thing i’ve done so far is place my object in the scene, along with a plane to act as the ground and a camera to record everything.
next you want to select your object, and in the properties menu on the right, select the physics tab (should be the very last one, the icon looks like a bouncing ball)

and for your object, you want to apply a collision and a soft body modifier (some people use rigid body instead of collision, so if you have issues with one there’s a chance the other might work out better. as for me, i usually stick to collision)

then select your plane and apply the collision modifier only.
now when you hit the play button at the bottom of the screen, this happens

it’ll just kinda float in place.
so to fix that, you select the object, go back into the physics menu, and look at its soft body settings

now uncheck the box that says “Soft Body Goal” (this’ll let gravity do its thing)

now when you press play after that

poor dude just kinda dies.
so there are a couple things i like to do to help it not… do… whatever that is.
go back into your object’s soft body menu and click on the tab that says “Soft Body Edges”

now underneath where it says “Collision:” you want to make sure that you have either “Edge” or “Face” (or both, why not live a little) applied to the object (this can help prevent clipping!)

we’re trying to make it wiggle n’ jiggle while still maintaining its shape, so what usually works for me is to crank up the “Bending” spring as high as it’ll go (which is 10) and enabling “Stiff Quads”

and we’re left with this!

and that’s how i do it! there are probably more efficient ways to get this effect, but for me


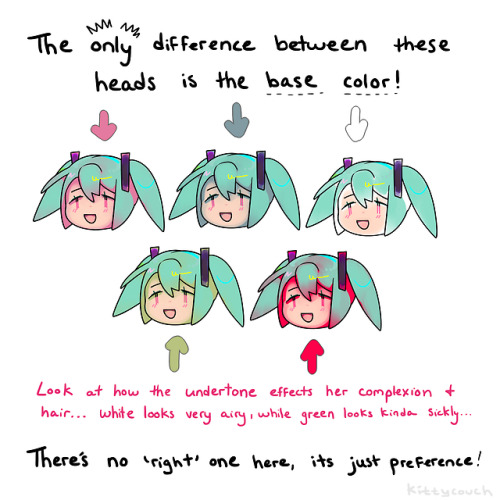

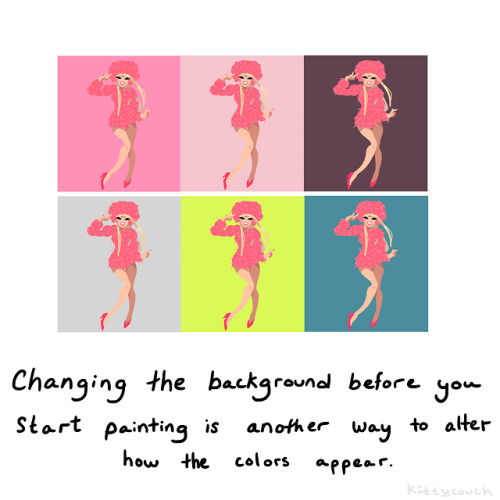
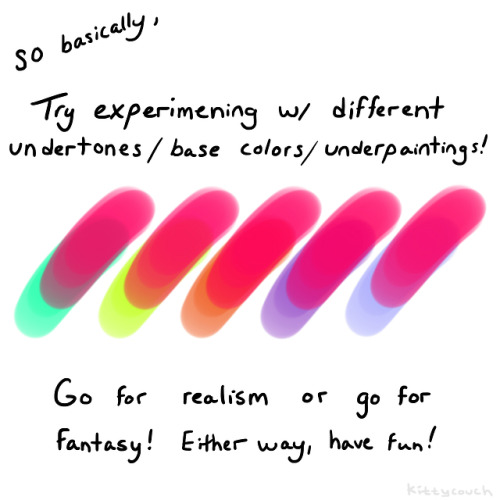
No one asked but here’s a brief tutorial on digital underpainting and how it can add some extra flavor to your art!
(I got asked this a couple times so just to clarify: I used “overlay” in the second slide… but the rest of these examples are JUST painted on, no effects! Try playing with the opacity on your pencil/water/brush tool to allow the base color to show through!)


By Lettiebobettie

Goat daddy
actually please don’t call him daddy : (
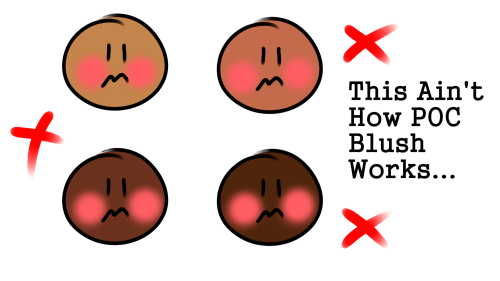
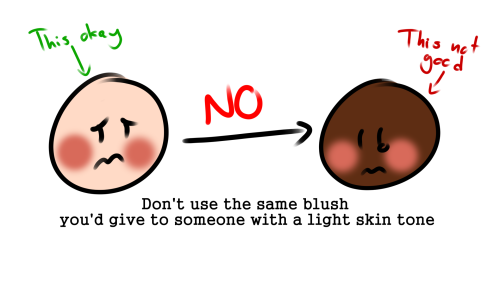
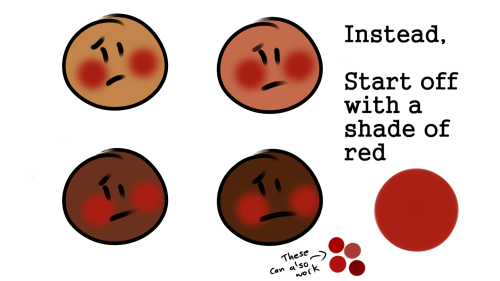

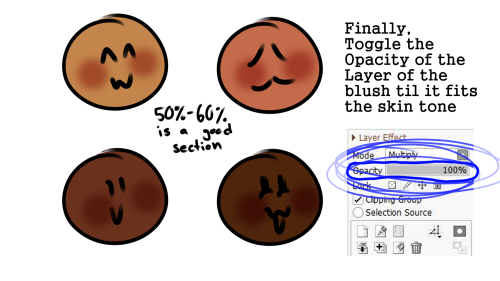
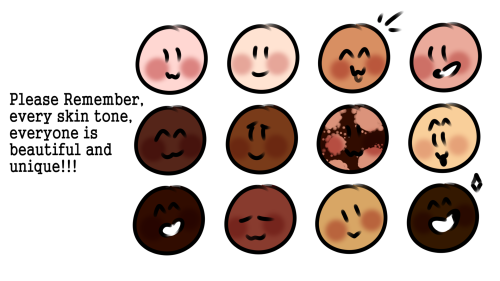
POC blush tutorial
Feel free to repost, but please credit me
Custom brush tutorial kinda??
Heres how you can make pixel brushes in Clip Studio Paint
first make a little pixel pattern and made sure that the background layer is transparent.

then you want to select edit -> register material -> image. this i remember from trying it before

next name it and choose a place for it to go among the others. doesnt matter where really. also check the texture box.

next to make the brush choose whatever brush that youd like to give it that has the properties you want and copy it. i just chose the standard oil brush. go to the copied brushes settings and click texture

click where it says none and find the brush that you made. after you click it change the setting to this

for me the texture works for subtract, multiply and compare. dont really know the differences between them all or form the others but for what i wanted those three seemed to work.
i did this for a bunch of different pixel patterns and brushes and got some cool effects! check it out!

i appreciate all the help and suggestions yall gave me!

maybe once i figure them out some more i could offer stylized commissions with them :V
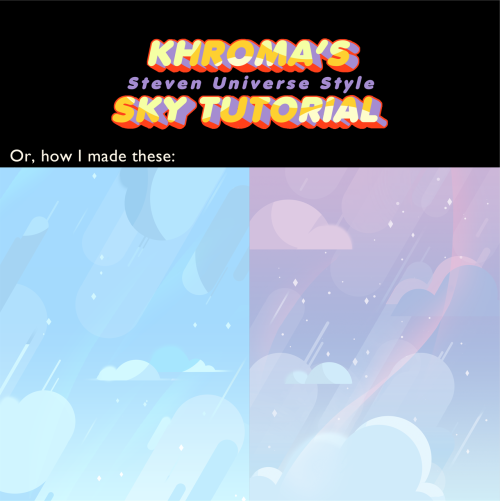
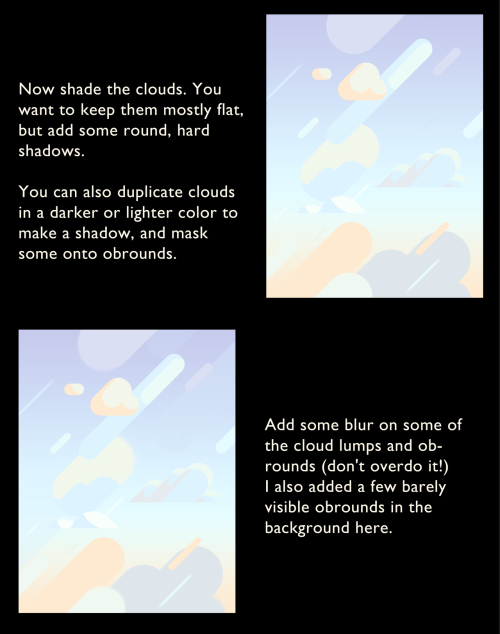
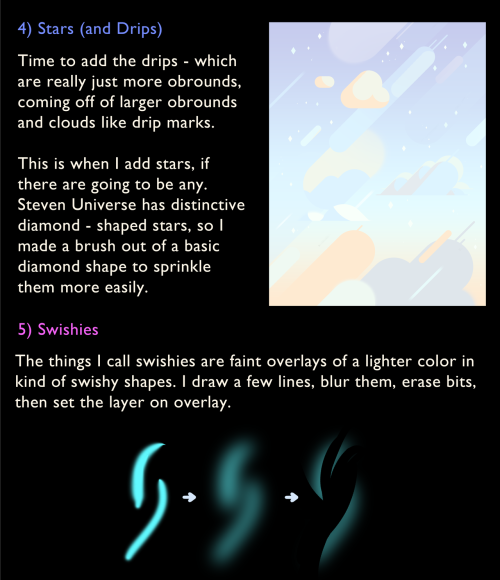

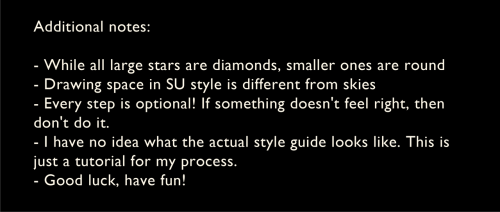
In conclusion, obrounds.
Sorry for the long post (I think it’s most legible in this format but yikes it’s long)


Hi there!! First off thanks so much for spending all that time!!
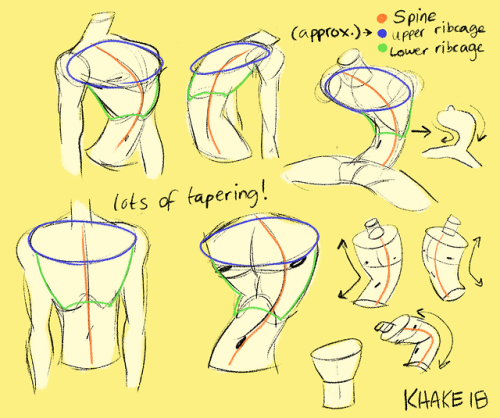
To be honest I’m still trying to get comfortable with anatomy….however I do have a lot of fun making bendy torsos (thanks to Junkrat’s horrible posture) and I think I’ve stylized them enough to make a tutorial on them.
I almost always start my drawings with a C-curve/S-curve to mark the spine, this way I can exaggerate the torso as much as I like. Notice though that in the GIF the C-Curve isn’t actually where the spine is, it’s more of a way to feel the flow of the drawing.
So anyway yeah!!! I hope this helped in some way?? Sorry if it’s not extensive, I’m still learning a lot!! And thanks for the ask, I appreciate the love <3
-
 randomp0ser liked this · 2 months ago
 -
 emcaco liked this · 3 months ago
 -
 sundertuvshintugs99 liked this · 7 months ago
 -
 cough-cough-ahem reblogged this · 8 months ago
 -
 frog-orchids liked this · 8 months ago
 -
 tradared liked this · 10 months ago
 -
 katanalabaster027 liked this · 10 months ago
 -
 w3irdoartist liked this · 10 months ago
 -
 riftsstuff liked this · 1 year ago
 -
 yeildonred liked this · 1 year ago
 -
 zen0bia reblogged this · 1 year ago
 -
zen0bia liked this · 1 year ago
-
 beepbopmop6 liked this · 1 year ago
 -
 userdrea liked this · 1 year ago
 -
 0832 liked this · 1 year ago
 -
 nilidoodle liked this · 1 year ago
 -
yaeirdo liked this · 1 year ago
-
 werewolfstonertboy liked this · 1 year ago
 -
 brothenjoyer liked this · 1 year ago
 -
 lujee liked this · 1 year ago
 -
 greenejo liked this · 1 year ago
 -
 hryggjdyg liked this · 1 year ago
 -
mybadartdotco liked this · 1 year ago
-
 scentedcloudtheorist liked this · 1 year ago
 -
 akirawilkins liked this · 2 years ago
 -
 procyonis liked this · 2 years ago
 -
 azusashissoggynoodles reblogged this · 2 years ago
 -
azusashissoggynoodles liked this · 2 years ago
-
 princington liked this · 2 years ago
 -
 turtledrop liked this · 2 years ago
 -
 lyrifaun liked this · 2 years ago
 -
 certified-llama-chauffeur liked this · 2 years ago
 -
 lyctor reblogged this · 2 years ago
 -
 fancypersonpsychicclam liked this · 2 years ago
 -
 beeeeniez liked this · 2 years ago
 -
 plumminke liked this · 2 years ago
 -
h-siete reblogged this · 2 years ago
-
h-siete liked this · 2 years ago
-
 titasign liked this · 2 years ago
 -
 sbevelord liked this · 2 years ago
 -
importantmentalitycowboy liked this · 2 years ago
-
importantmentalitycowboy reblogged this · 2 years ago
-
 distilledbear reblogged this · 3 years ago

Sylwester | i will mostly post sketches, because i'm too lazy to end them
196 posts