Me, The Motherfucker With Over 50 Abandoned Works In Progress: I Have Another Idea
me, the motherfucker with over 50 abandoned works in progress: i have another idea
More Posts from Programmingravenclaw and Others
I can’t wait to be at a point in my career where I can look back at this exact moment & think “idk why you were stressing about not being enough… you good fam”
How To Make Tumblr Themes: Part I
Introduction
What we will cover in this tutorial:
HTML review (bare minimum you need to make a basic theme)
CSS review (bare minimum you need to make a basic theme)
Meta Tags
Other <Head> codes
Documents and websites we will consult regularly in this tutorial (keep these open in a tab):
W3Schools HTML
W3Schools CSS
Tumblr Theme document
HTML Review
Before making a theme, you should know that HTML consists of tags (keywords surrounded by angular brackets like <html>) and that they come in pairs (opening and closing like <html> and </html>).
You should also already know basic HTML elements such as links, headings, paragraphs, lists, formatting and images. If not, please learn it at the website I provided.
The most common way to group and position things in a website layout is to use div layers or tables. In this basic theme tutorial, I will cover div layers first since it is easiest to understand.
Here is a coding for text that is NOT inside a div layer:

[click for larger view]
Here is a coding for text that is inside a div layer:

[click for larger view]
Also notice that I used CSS to dictate the width and background of the div layer. That is how CSS and HTMl is connected; you can use CSS to demand HTML elements to look and be positioned a certain way. So in order to make columns in tumblr themes, you use CSS to position and “decorate” the div layer which will wrap your columns (ie: posts, sidebar etc).
CSS Review
In relation to what we’ve discussed above, CSS commands HTML elements. So you need to be very familiar with CSS. CSS is the codes between the <style type=“text/css”> and </style> tags (as can be seen in the previous image). In this tutorial, I will use the following terminology:

Now, div layers can either be id-ed or class-ed. The id selector is generally used for a single unique element while the class selector is used for a group of elements. While there is that difference, I discovered it doesn’t matter. You can use id selectors for multiple/repeated layers.

[click for larger view]
In the above, the selector for id is preceded by a “#” (outlined in pink) and the selector for the class is preceded by a “.” (outline in blue). Now, you can use basic CSS properties to specify the position, dimension and style of the layer.
You will need to know 90% of the properties described on this site; particularly background, color, fonts, links, text, margin, padding, z-index, position, display, dimensions and borders. Since it is too much for me to cover them all, please review/learn them before proceeding.
Getting started
Now we’ve gone over the idea of how HTML and CSS will be needed, we can apply it to tumblr themes. So, we start with our basic HTML tags for any basic webpage:

<title></title> is where you specify the title of the blog which will show up on the browser tabs. Looking at the basic variables section of the custom tumblr theme document, you can see {Title} and {block:PostTitle}{PostTitle}{/block:PostTitle}.
{Title} is a “variable” which corresponds to the blog title (which you customize in the customization page). For example, my theme blog title is “ettudis”…

{block:PostTitle}{PostTitle}{/block:PostTitle} corresponds to the title of the post (of the individual posts). The “blocks”, {block:PostTitle} and {/block:PostTitle}, renders so that the post title shows up only when there is a post title (in other words, when you go to the individual post page. For example, the title of my “terms of use” post…

Generally, it is set up so the it’s the {title} followed by a dash, then {block:PostTitle}{PostTitle}{/block:PostTitle}. So, it will look something like this:
<title>{Title} - {block:PostTitle}{PostTitle}{/block:PostTitle}</title>
We also can add in favicons. To make the favicon the same as the blogger’s userpic/profile icon, we can just link to {Favicon}, like so:
<link rel="shortcut icon" href="{Favicon}" />
Meta Tags
The meta tags in tumblr themes are what allows the bloggers to customize the themes colours, upload images, select options, add links etc, as described in the appearance options. Then, you can line up the meta tags to the HTML or CSS.
For colours, it will look something like this:

[click for larger view]
As you can see, the colours in the meta tags can correspond to the HTML or CSS. So the default colours (indicated in the meta tags, ie: #FFFFFF, #000000 etc) are what the colours are if the blogger reset to defaults. If the blogger decides to customize to his/her own colours, the colour he/she chooses will correspond and fill into the HTML or CSS in the live preview.
For custom fonts, it will look similar to:

[click for larger view]
Similar to colours, the meta tags correspond to CSS (or HTML). However, tumblr only provides a few custom fonts (ex: arial, georgia, impact, courier new, helvetica, tahoma, trebuchet ms, times new roman etc) that are selected via a drop-down menu on the customization page.
Now booleans are rather important in tumblr themes. These meta tags allow the bloggers to select an option.

[click for larger view]
In this, the option is whether or not “if infinite scrolling” should be on the blog. The meta content is “1” if there is infinite scrolling as default. If infinite scrolling is not default, it meta content should be “0”.
Outlined in orange, {block:ifinfinitescrolling} and {/block:ifinfinitescrolling} wraps around the HTML (or CSS) that will be activated if the blogger decides to select the infinite scrolling option. If not, then the HTML (or CSS) in {block:ifnotinfinitescrolling} and {/block:ifnotinfinitescrolling} will be activated.
Booleans can apply to anything, such as whether or not to show tags on index page, size of post, number of columns, show side image ~ whatever your imagination allows you!
On this note, this sort-of gives you the idea of how tumblr codes work. The “blocks” act as activators for a certain code that it contains. Remember they always come in pairs as well, an open and closed one.
In the above example, you can see that there are the blocks, {block:Pagination} and {/block:Pagination}. This means that the codes inside these blocks will only show if there are actual pages; so in an individual post page, the pages will not show up.
Another meta tags are text. You can allow bloggers to enter their custom text into a theme. You can do a lot with text, you can also use it as an input for CSS hex numbers, dimensions (they would enter pixels), labels etc etc.

In this particular example, I’ve used custom text as a way for bloggers to enter links. The blocks (in pink), as I’ve explained previously, act as activators for when the bloggers do enter a URL in the “link 1” meta tag (outlined in blue).
Tumblr also allows bloggers to upload images. So bloggers can upload their own background or other images they want (that you specify) into their theme.

[click for larger view]
Shown here, you can see that the meta tag for the background image dictates the CSS body selector (outlined in orange). In the content, you can insert an image (“http://static.tumblr.com/…”) as a default image.
As for the sidebar image meta tag, it uploads the image into the HTML. Blocks (shown in pink) can also be used in case the blogger does not want to upload an image (or if an image is not uploaded, an alternate coding can be shown).
Other <head> codes
You can also insert a {CustomCSS} block at the bottom of the theme’s CSS style block (before </style>) so that bloggers can insert their own CSS if they want to.
There is also a meta tag that is involved in search engines.
{block:Description}<meta name="description" content="{MetaDescription}" />{/block:Description}
This allows the description of the blog to show up if the blog is searched on the a search engine (such as google).
And that’s all I have to say about meta tags which is crucial if you plan to make themes for the public use.
Key Points
To clarify and emphasize, the terms, “variable” and “blocks” are what makes up the tumblr theme. Variables are used to insert dynamic data. As we’ve seen in previous example, {Title} is a variable and so are {Image:Sidebar}, {Color:Background}, {Text:Link 1} and so forth. They come in singles, meaning, you do not need to close them.
Blocks are used to render (activate) a block of HTML, CSS, or a set of data. As we’ve seen in previous examples, {block:Title} and {/block:Title} are blocks, and so are {block:ifinfinitescrolling} and {/block:ifinfinitescrolling}, {block:iflink1} and {/block:iflink1}, and {block:ifnotsidebarimage} and {/block:ifnotsidebarimage}. These come in pairs, meaning, you do need to close them similar as to you would close a HTML tag.
The meta tags allow users to customize the theme without editing the HTML/CSS themselves. They only have to customize via the Appearance section on the customization page. We’ve covered all the meta tags that tumblr has: colours, fonts, booleans, text and images. Every meta tag can correspond to a HTML/CSS component. So using HTML and CSS, you can specify the look of a certain variable and meta tags can give customization options for the HTML and CSS.
The End
I think I’ve covered all the basic ideas of what tumblr themes need in order to work. Though this tutorial was more of introduction on just the fundamental foundations of what we’re going to build, next tutorial will get into constructing the tumblr theme using variables, blocks, CSS and HTML.
I hope I was clear, concise and thorough in my explanations. If I missed anything or if something wasn’t clear, please let me know as all of this sort-of comes to me naturally now so I wouldn’t know if I was being abstruse or convoluted.
when my computer decides to deny me access because of “admin restrictions”


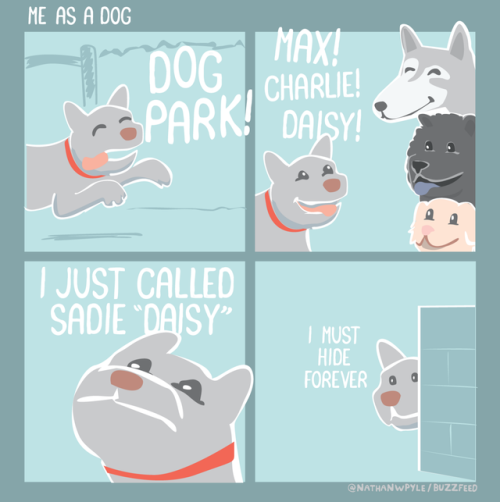
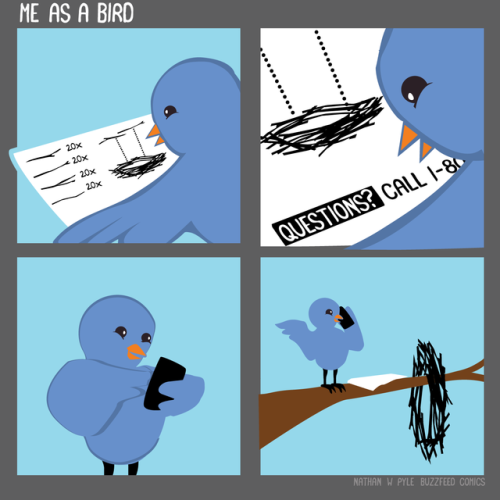

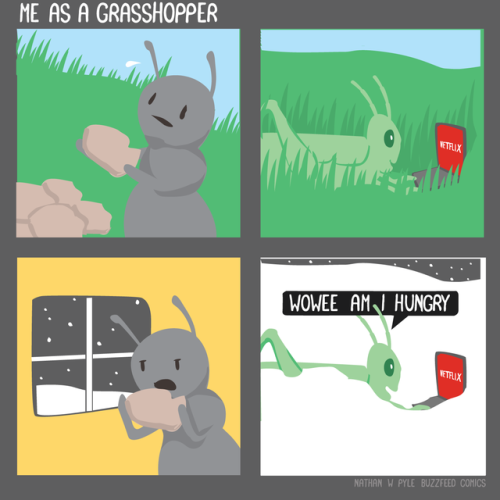
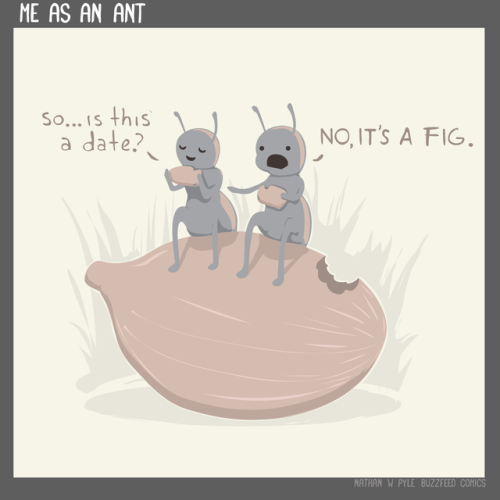
by Nathan W. Pyle
Here is thing I learned when I was 29, which I now give away for free: If you want to do a thing, do it now, or as soon as feasible. Because there might not be a later. If it is a complicated or expensive or hard thing that takes many stages or has a steep learning curve, start working on the parts you can work on while you can work on them, then move on to the next thing. Accept that there will be a lot of failures along the way, and that you can come back from nearly any mistake that doesn’t involve making a left turn in front of an oncoming semi. Concentrate on yourself and what you can do, and don’t rely on other people to fix things for you, even though you might love them or they you. (This doesn’t mean you can’t love friends or family or partners. Friends and family and partners, in the long run, are the thing other than Useful Work and Adventures that make life worthwhile. Well, all that, and a really nice coffee and tea kit in the kitchen and the skill to use it. But that last thing isn’t terribly expensive unless you make it be.) But to succeed at a thing–a job, a relationship–in the long term, the thing is: You Must Commit, even though commitment is scary. And commitment is scary because once you’re in you’re in. It’s not bobbing around close to the shore, paddling with your feet. It’s both feet and swimming as hard as you can out where the rip currents and the sharks are, where the water turns blue. You can’t hold back because you’re afraid of getting hurt: you have to accept that you are going to get hurt, and put your hand in the fire of your own free will. It’s like climbing. You can make sure you’ve got good ropes and a belayer you trust (you SHOULD make sure you have good ropes and a belayer you trust!), but there’s moves you can’t make unless you’re willing to risk falling. I’m not saying follow your bliss off a cliff, in other words: part of being prepared and committed is having the right kit, whether it’s money in the bank for the lean times when starting off as a freelancer, or a partner who supports your work, or being young enough that starving in a cold room for a few years with pneumonia is romantic (I have the T-shirt!). That’s why it’s scary. It’s scary because you are taking an actual chance. But: things don’t work out the way you want them to if you just kind of drift along seeing what will happen. Nice things might happen! …but they didn’t, for me. Basically, what I figured out was that I had to be a protagonist if I wanted anything to happen, and part of being a protagonist was accepting that I might fail. And then have to deal with that failure. And that if I didn’t do it I would more or less inevitably fail, but I could pretend to myself that it wasn’t because I wasn’t good enough and that I didn’t know why. Seeking success, in other words, meant letting go of a layer of ego defense. This realization directly led to me having the career I always wanted, and doing pretty well at it. It also led to me having the best relationship of my life. I wish I’d learned it when I was sixteen, rather than twenty-nine, but I had some things I had to work through first.
So that thing you want to do? Assuming it’s not illegal or immediately fatal? Do it now.

Margaret Hamilton (b. 1936) is a computer scientist and engineer who, as Director of the Software Engineering Division of the MIT Instrumentation Laboratory, played an important part in the Apollo space programme. Her division was responsible for developing the onboard flight software for the missions that put the first men on the Moon, and she was the supervisor and lead programmer of the project.
She graduated with a degree in abstract mathematics, during a time when computer science and software engineering were not yet disciplines in their own right. She worked for the SAGE Project, used by the military in aircraft defense. Since 1986 she has been the CEO of Hamilton Technologies, an organization which she founded.
Consider going into a classroom and looking around, and you’re the only man there. Even if you’re totally ok with that (heck, you expected it), you notice. You feel all the women in the room notice you and see that a lot of them are glancing over at you or making comments about your presence. Ok, you knew that might happen. A woman next to you says, “Hey, cool, a guy in a CS class, good for you.” When it comes time to form a study group, half the women in the class don’t want to work with you because they assume men aren’t as good at CS. The other half jockey to work with you, some for the novelty (“Hey, I’m in a group with the guy, ”) and half because they want to ask you out. When you go to apply for an internship, a lot of companies seem really interested in you, but you’re not sure if it’s because they like your resume or just because you’re a guy in CS and they want to look open and forward thinking by having lots of male interns coding. You meet up with a group of female interns and one makes a slightly sexual joke. Everyone freezes and looks at you - are you one of those guys in CS that is serious and can’t take a joke, or will you be one of the girls? At your job after you graduate, it’s naturally not ok for a woman to say outright that she’s prejudiced against male coders… But maybe your boss gives you slightly different work, or it takes longer for you to get a promotion because they need more proof that you are good - you don’t get the benefit of the doubt the way the girls do. When you express a strong opinion about a tough problem, the women write it off as you being sensitive and emotional - men often are, you know. When discussing your career ambitions, your coworkers often ask you how children play into that - I mean, you’re probably looking for a wife and plan to have kids since you’re in your late 20s. Everyone knows it’s a safe bet that kids are going to derail your career at least temporarily, if not permanently. You frequently police how often you mention family at all for fear people will assume you’re expecting a kid soon… … Does this begin to explain it, at all? Even when a company is open to women working in all areas and no one is a dick, there is still a lot of pervasive bias that affects how women are treated and perceived. Why would you notice? It doesn’t affect you.
Electrostaticrain (Reddit)
How To Easily Remember the Unit Circle
I work in a walk-in tutor lab at my university and one of the other tutors showed me this a couple years back and it has changed my life.
First, you make a table that looks like this.

Then, go ahead and add in some nice denominators of 2 in every entry in the table.

Then give yourself some nice square roots on the numerators.

Alright – now we’re going to fill it in. The only value you have to remember is that sin(0)=0. So we put 0 in the numerator for 0 in the sine column. Then we just count up as we move down.

Then we do the opposite in the cosine column.

Then we simplify!

And voila – a beautiful unit circle table.
"Stop beating yourself up. You are a work in progress - which means you get there a little at a time, not all at once."
- Unknown
-
 yuchan44 liked this · 5 days ago
 -
 newdawnhorizon reblogged this · 2 weeks ago
 -
 winterhazes222 liked this · 1 month ago
 -
 sillyguyposting liked this · 1 month ago
 -
 mall-fountain-daydream liked this · 1 month ago
 -
 currentlycreating reblogged this · 1 month ago
 -
 0vix0 reblogged this · 1 month ago
 -
0vix0 liked this · 1 month ago
-
 kowal155-blog liked this · 1 month ago
 -
 tsijiari liked this · 1 month ago
 -
 jadesage reblogged this · 2 months ago
 -
 imgay-inmexican liked this · 2 months ago
 -
 escaramelo liked this · 2 months ago
 -
 slowburnsoldier liked this · 2 months ago
 -
jadesage reblogged this · 2 months ago
-
 laniebooluvsyou liked this · 3 months ago
 -
 mjuuuk liked this · 3 months ago
 -
 tiddycaps liked this · 3 months ago
 -
 alrightythenbabe reblogged this · 3 months ago
 -
 willknightauthor reblogged this · 3 months ago
 -
 brokendeerteeth liked this · 3 months ago
 -
 reallystupendouschaos liked this · 3 months ago
 -
 catts-tatts liked this · 3 months ago
 -
 cinna-chai-latte reblogged this · 3 months ago
 -
cinna-chai-latte liked this · 3 months ago
-
 xxpassion-of-loversxx liked this · 3 months ago
 -
 nolongerpoisoned reblogged this · 3 months ago
 -
 s-h-y-y-a-n-n-e liked this · 3 months ago
 -
s-h-y-y-a-n-n-e reblogged this · 3 months ago
-
 ivebeenfallingfor-30-minutes liked this · 3 months ago
 -
 tiffanybluesclues reblogged this · 3 months ago
 -
 legendarymusicking liked this · 4 months ago
 -
 rosemirmir liked this · 4 months ago
 -
dead-winglesstiger liked this · 4 months ago
-
 thiamsxbitch liked this · 4 months ago
 -
 clarahastoomanyblogs reblogged this · 4 months ago
 -
 reginalapis reblogged this · 5 months ago
 -
 jeff-fiene liked this · 5 months ago
 -
 heartofthedarkphoenix reblogged this · 5 months ago
 -
heartofthedarkphoenix liked this · 5 months ago
-
 green34-54 reblogged this · 5 months ago
 -
 a-little-harmed-shinra reblogged this · 5 months ago
 -
 draconiccreature liked this · 5 months ago
 -
 somebitofeverything reblogged this · 5 months ago
 -
 fablenaught reblogged this · 5 months ago
 -
 annapt99w liked this · 6 months ago
 -
 leejian liked this · 6 months ago
 -
 softneomiro reblogged this · 6 months ago
Full-time Computer Science student, reader, and gamer with a comics addiction.
121 posts